Christmas 2013

Christmas 2013

Deuteronomy 11:18-19

18 Fix these words of mine in your hearts and minds; tie them as symbols on your hands and bind them on your foreheads. 19 Teach them to your children, talking about them when you sit at home and when you walk along the road, when you lie down and when you get up.

Deuteronomy 11:18-19

New International Version (NIV)

Thursday, May 31, 2012

~~~ More Worms~~~ An Experiment :)

Night crawlers!! This one was average size of the 3 J got! See how it's lifting it's head? 
J said it was trying to escape! This worm was about 8 inches long stretched out! 


J got these HUGE worms called night crawlers from Grandpa F Sunday night while we were visiting. We decided to do his last science experiment by the book with them :) We did a large unit study on worms and learned way more then we were suppose too for his science but the experiment is cool so we're going to do it too ;) 

First you put sand and dirt in layers in a jar, pop bottle with the top cut off or some other see through container. It says to add onion leaves or leaves or something like that to the top but we just added some worm food from the bin instead as I thought onion was on the no no list for worms.. and it is :) 


See how you can see the layers of sand and dirt? 
The experiment is to put your worms in the container and put them in a cool dark place for 3 days and then your should be able to see that they have been turning the earth in the jar. The sand and the dirt should be mixed up! 
Now J put 3 LARGE night crawlers and 2 larger worms he found outside in the jar and now 3 days later you can see that they have mixed the earth around a bit but not enough to really see it well.

A few things we would do differently is to add water.. worms don't like to be dry. I did add some water the 1st day and again today as the bottom half of the jar was still very dry. I think they will mix it better now that the earth is wet. I would also leave it a bit longer and I think next time we will mash up a banana for them instead of using the worm food we had from the bin. They haven't, and I just realized probably will not, touched the carrot unless they are in there for a LOT longer then 3 days. 

Now I'm just wondering what we're going to do with them after the experiment is done?
I'm not sure I want them in the house.. they are practically snakes at that size! 
***SHUDDER***
I seriously DISLIKE SNAKES!!! 

I think they may have to find a new home in the dirt pile at the end of the driveway.. 
J wants to keep them, cut their tails off to go fishing with and watch them regrow their tails! 
And keep them forever and ever...
um..

Maybe not 

but 

Maybe??

Science ~Friction and Gravity~


Reading 'Forces Make Things Move' before getting out the toys and experimenting! 


Mac and Lightning McQueen worked great!! 


Everyone got a few turns to try it out. J3 is letting Lightning hit the sandpaper..
then they moved to the kitchen and got some great results on the lino! 

The kids science project was to see what different surfaces, carpet, lino or hardwood, sandpaper and paper, did (slow it down, speed it up?) to the same car with the same force/gravity behind it. Then they had a sheet to fill out about which went the farthest and shortest and why. 

Wednesday, May 30, 2012

First Fruits 2012~ Rhubarb


J and L cut up the rhubarb they harvested from our plant. We made a rhubarb crisp with it and stuck in in the oven. When Papa went to work in the morning he turned it on and we had a nice hot breakfast to wake up to! We are going to try and do more breakfast prep like this as the house is cool in the morning but not cool enough for a fire and the oven on for an hour or so warms us right up.
Next time though I'm going to remember to put sugar in the rhubarb!! 

Here is what we did.. it was pretty good, but not the best we've made.

Chop rhubarb into fairly small pieces.. too big and they will not cook through. 
We had about 8 to 10 cups of rhubarb.
Pour about a cup of sugar? (this is the part I forgot!) over the rhubarb evenly.

Mix together 
 1/2 cup flour, 
1/2 cup of sugar,
About a cup of melted butter,
1tsp salt,
2 cups and a bit :) oatmeal,
1 tsp cinnamon 
until well mixed..
I used my new mixer with the whisks.
Dump this over the chopped rhubarb in the baking dish.. we used a roaster :) 
Make sure you cover all the rhubarb.

Bake at 350F for about an hour.


 ENJOY!! 
We love rhubarb crisp with cream or milk on top for breakfast, lunch or dinner :) Or dessert :) 

Or all 4 :) 

Cheese Making 101?~ What IS The Problem?


Papa and I made a batch of cheese Mothers Day weekend in his new SUPER POT. This is how much cheese 8 gallons of milk makes :) YUM!!! Too bad the cheese was hard and rubbery! We are still trying to make a decent cheese. I did another smaller batch today with a different culture and all the cream. Our cheese making friend Mrs. E's told us taking the cream off can cause your cheese to be rubbery, we are willing to try just about anything at this point. The only cheese we've made that was really eatable was my simple vinegar cheese! All of our hard cheese has been rubbery or holey or something. Papa was saying the other day that it is not like us to fail so badly at something so many times in a row. It is not a cleanliness issue as our cheese, rubbery as it may be, does not mold.  

Update :) The cheese I made yesterday is out of the mold this morning and the tiny taste I got tasted a LOT better.. so maybe buttermilk culture will be our saving grace of cheese making! I'll keep you posted :) 

Monday, May 28, 2012

Cutie Pies!


I don't want too...

FINE I WILL!! 

There I'm WEARING THE HAT!! 

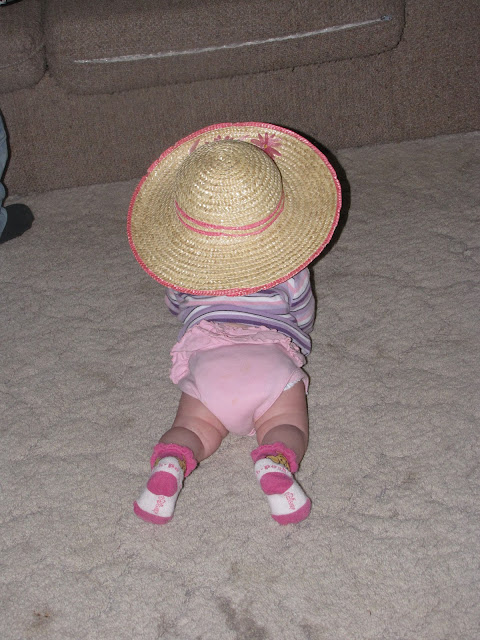
Papa napping under the 'sombrero' as the kids dubbed E's hat, while Baby G plays with a truck and watches herself in the living room mirror! 

Friday, May 25, 2012

ZZZZZZZZzzzzzzzzzzz!! Nap Time :)


J3 asleep on the couch. 
Several people have asked me how I get my kids to sleep everywhere and 
I thought I'd put a little blip on here. 
We practice, we learn to lay still and mostly we learn obedience from a early age. 
He was only about 14 months old when he decided he'd had enough with naps. 
I disagreed. He was a cranky little person and still would fall asleep at 4pm if he missed his 2pm nap. 
Did I mention kids that need naps who don't want to nap make ME cranky?
They do.
VERY!!
When J was this age we battled.
 Actually he was about 9 months old and refusing to sleep during church when it started. 
I won.
He slept.
He started to sleep with me in the room.
Then with me out of the room.
He still naps sometimes and still will sleep at nap time! 
It's simple.
You WIN the battles you choose. 
I choose to win, I planned my battles, my steps, my days
and then I won them. 
Step by step.

Step 1. Decide when nap time is for your training week. It helps the 1st week if nap time is always at the same time. After the 1st week they should be able to nap any time and everywhere.

Step 2. Clear your life for a week at nap time. (This is not hard for me normally but with Baby G it made things a bit harder which is why J3 still naps on the couch.. where I can see him.)

Step 3. Find a good book. 

Step 4. Talk to the child... tell them "It is nap time. Nap time is when you sleep, you are going to sleep. You will lay still and you will not move and you will go to sleep." My kids have to lay on their sides and face the wall.. something my mother did with us as kids.. walls are generally boring. 

Step 5. Mean what you said in step 4. Enforce it.

Step 6. Sit beside your child's bed, or in my case the couch, and read your book. If said child moves/talks /gets up or anything besides laying quiet and still, remind them of step 4 and discipline as often as needed. BE CONSISTENT!! 

Step 7. Spend the next 3 or 4 days doing this at every nap time. DO not leave the child's side until they are asleep unless the house catches fire..or in my case Baby G wakes up :) 

Hints and Tricks.

It really helps to have a fan or music going while you are 'in' training. I still keep music going in the living room while J3 sleeps. He almost always falls asleep to All Hail The Power of Jesus Name, the second song on the list. I keep the music on because the rest of us don't always remember to be quiet while he's sleeping and it muffles the sounds we make while he sleeps. 

Don't get such a good book that you forget what your doing : S

BE CONSISTENT!!! The more consistent you are the faster it will work. 
If the phone rings on day 3 and you answer it and chat for 39 minutes in the other room while forgetting your child was ALMOST asleep.. you'll likely have to start on day one the next day. Not always.. but quite likely. 

Kids have a knack for kicking a habit before it hits 3 days.
 Some kids need 4 days in a row.. some only need two.. shoot for 4 and save yourself the trouble of doing it again in a week. 

J3 will now sleep anywhere.. the first day you take the child out somewhere at nap time make sure where ever you take them is kid friendly enough to handle it if you have to use some discipline. I often just put him on the couch beside me for the first few times while we are out and about and often people don't even know he's there. I can nap my child without missing out on visiting or having to run home for naps. I can nap them, and have, at the beach, church, grandma's house, long car rides, the mall (in the cart!), on the lawn, pretty much anywhere!  This frees us up amazingly. We can spend a day at the beach with a happy napped kid, or spend a day shopping or whatever, wherever we want and the child who needs to nap gets one :) 

Thursday, May 24, 2012

*Spring Yumminess*

Strawberries 
Whipped Cream 
and 
Angel Food Cake..
YUP from a BOX :) 
Super Duper YUMMY!! 

Wednesday, May 23, 2012

~~Beer Stuff~~

Papa got some new beer stuff with his spring bonus this year :) 


8 gallon pot!! With spout and thermometer!! Sure! I can find LOTS of uses for that! 
The blue lidded thing is a filter, filters the sediment out of Papa's brew.


Tap for his very own beer fridge :) 

Papa making beer with his new pot!
 It's so heavy and awkward half full that we were both needed to bring it inside!! 

We've also made cheese in it and we love the thermometer on it.


The beer Tap on the beer fridge :) Papa loves it. 

Tuesday, May 22, 2012

~Strawberry Jam Night~

My wonderful friend Mrs. B and I made strawberry jam together last week. 
The kids helped and we had a blast! 


Strawberries rinsed and the tops cut off. Lucky worms :) 


Smashed up strawberries in my food processor.. 


Chopped up strawberries waiting to have the pectin and some sugar added in before cooking.


Wonderful Mrs B who stirred both large batches of jam! 


A closer look! You can see it is boiling :) 


The very yummy strawberry foam. 


We got to this point and I found out that Mrs B had never ever canned or made jam or anything like this before!!  She was amazing! I told Papa later it was like working with myself :) Like as in TWO of me! We worked very well in sync together! And we got 8 pint jars and 6.5 quart jars full of jam!


Putting it into jars! Clean hot jars, wiping the rims, putting lids and rings on and placing each jar upside down to heat the seal.


Mrs. B's finished 8 pint jars with 3 of my quart jars! Good Stuff! 
A few days later I made 6.5 more quarts for a total of 13 quarts of jam.. should last us for a bit anyway! 

Oh and if you are wondering about a recipe? 
It's easy.. 
You buy a box of pectin from the store and follow the instructions :) 
We both bought lite pectin which uses less sugar and then both used less sugar then they said..
which makes the jam a little runny but really easy for kids to spread :) 
SUPER EASY!!! 
I love easy :) 

Monday, May 21, 2012

~~~~~~~~Worms Worms Worms ~~~~~~~~A Review :)

My very first review :) I'm a tad nervous :) 

 Northern Worm Ranch.  has given us the opportunity to review their new Medium kit!  The Medium kit included two medium totes, coir, sand, shredded paper, a pound of worms (Red Wigglers), several large sheets of paper, a 45 page Unit Study on CD, instructions, fun facts sheet and a welcoming letter :) As they live nearby they dropped off the kit on their way to 'town.' They are willing to set up meets with buyers or even bus the kits right to you!! Worms, we found out, can live for several days in the little containers they package them in. Jennifer, the head worm wrangler, told us a story about a batch of worms that got delayed for 4 days and were happy and healthy when they finally got to their new home! 

We had some fun setting up the kit.. the instructions were easy to read and follow and I'm pretty sure J and L could have set it up alone with very little trouble. We all pitched in and got in on the action. 
The first thing you do is put your paper in the bin and then mix the sand, dampened coir (which is sort of super worm food if I understand correctly.), and some shredded paper together in the bin. You have to add a lot more water then you think to get the coir all damp. 

Then you mix it up. When it's all mixed up you get some nice soft worm food as worms don't have teeth, we used a mashed banana, and you put that in your bin. The worms go into the bin next, close to the food so they can find it, and the kids had a blast opening the containers and gently dumping the worms in. Then you cover the whole thing with shredded paper. 

(R watching the worms dive away from the light!)

This next part was the hardest part of this WHOLE FUN PROJECT...

you have to WAIT!!! 

Worms take a few days to make themselves at home and you have to give them a few days to get comfortable. You also have to leave the light on in the room the bin is in or they might try and find a more hospitable home!!! This involved me leaving tape over the light switch so I would remember! Worms don't like light and will not try to escape unless it's dark! 

While we waited to do more of the hands on worm stuff we went instead to our Unit study to learn more about these amazing animals. 

We learned neat worm facts.. 
Did you know?
 Worms move by shifting water through the sections of their bodies?
They have 5 hearts and 1 brain? 
OR 
Worms don't like garlic or salty foods??


We also colored worm pictures, 
looked up worm related words, 
learned what to feed or not feed them, 
did worm word searches,
learned what day God created worms on and 
copied out verses about creation and doing the best we can, 
drew worm pictures,
 learned how worms can defend themselves, 
and we didn't even get to do the whole study!! YET :) 

The unit study is aimed at kids between 5 and 10 years old and has things for bigs and littles.
 All of our kids enjoyed it even R who is only 4.
 J3 even had some fun watching worms dive from the light.

We did over 1/2 of the study over the last 2 weeks and plan to do more as time allows.
I THINK if we were doing school full time and I actually planned ahead we could easily do the entire study in about a week while only doing school a couple hours a day. As it was we did it piecemeal as we had time and it worked nicely for that too. 
I think you could take as little or as much of it as you wanted depending on the age of your kids and your time. 

  
We also learned that worms can eat between 50 and 100% of their body weight PER DAY!!
If L ate half his body weight in food in one day he'd have to eat as much food as R is heavy!! 
That is a LOT of food!! 

When the worms had gotten used to their new home we took some out and had a good look at them. 
I forgot to take pictures but even R held a worm and enjoyed it! 
J can talk of nothing but fishing with worms and 
L and E are both a bit leery of the worms but like to show them off :) 
They all handled the worms and they all take great pride in showing visitors 'our worms.' 
About two weeks into our vermicomposting (composting worms) we noticed that the shredded paper on top was damp and nasty and the worms weren't really moving to the other side of the tote. SO we shredded up some more paper for them. Now just a few days later they are looking much happier :) 

And when the bin is full we will have a bin full of worm castings which are super good for gardening and plants!!

I do have to say though.. 
That I HAD NO IDEA HOW COOL WORMS ARE until this study. 
I'm pretty sure I learned more than the kids. 


Forgot a few things :)                               

If your interested but unsure come on over and take a look see :) We love visitors :) 
And THANKS Jen and Andrew and those cute little junior worm wranglers
for giving us this opportunity to try out and review your vermicomposter. :) 

Wednesday, May 16, 2012

The House :)

Ok I forgot some of you have no idea what we are building here :) 
The totes on the floor on the right of the picture is the new floor we just finished. It goes the length of the trailer and will be kitchen, pantry and bedrooms. (in that order front to back) Only the outside walls and the hallway walls are going to be straw bale. The center where the trailer is sitting will also be house, two stories,  but we need to be able to live in the west side addition while we build the center. (and we finally figured out how that will be possible!!) Papa said last night it MIGHT be possible to move the trailer out next spring!! IF we get the west side walls up and plastered before then and a few other IF'S!! 
The yellow travelall is in front of the smaller east side addition we plastered last fall and built the fall before that. 
*No we haven't bought a new truck.. it's a neighbors who needed a ride. :) 

That burn pile up front is several weeks worth of stick pick up around the place, some plum tree branches Grandma and Grandpa F brought over and the boxes the chicks came in. E's asthma is too bad to burn it now and so we'll just keep adding to it :) 

Project Finished Floor.


Ok this is a terrible picture but this is what the front area used to be.. a big open space that was nice to store feed and hang dead things up in! :) I didn't take a before picture so I had to go digging for one and this is the best one I could find. This is in 09.

Here we are in 2012 
Papa and I hammered in the floor joists one day and then 
Papa screwed in the bridging.


We 'glued and screwed' the OSB on another day and then the kids and I puttied the cracks
 before Papa rented a sander and sanded the floor.


Primer was next, which the kids loved :). The OSB soaked in a lot more primer then we expected so this ended up being a couple evenings work as we ran out if primer and had to get more.


Then we used our muscles and moved all the stuff we've stored on the floor over the years
 onto the freshly painted part :) 


Except the new playground which Papa had to take off with the skid steer. 


Then I swept and putty-ed.. 


Now we just need to finish the last 8 feet of joists, bridging and OSB, putty the cracks, 


 sand the whole thing....


and primer it!!


Lovely isn't it? 

Now we are ready for WALLS :) 

Tuesday, May 15, 2012

~Signs of Summer On the Homestead~

Or warmer weather anyway :) 


A stack of firewood surrounded by green grass.


Some laying hens just laying around.


Star having a nap in the sunshine.


Brothers in the sandbox.


Siblings in the sandbox! The littlest one looks on from the stroller.
Looks a little crowded....good thing we're building a new one :) 


Sisters in the sandbox. R says they was making pancakes.


Pushing the baby in the stroller! 


J riding MY BIKE!!! 


Going for a 4X4 ride!!


Smiles in the stroller! 


Papa de-shedding the dog while his beer waited for him...


He said I shouldn't take picture of his beer without the head on it... it had waited for him for a while when I took the picture.. it DID have a nice head on it when he built it from the tap. :)


 And, of course, there are little boys and their swords :) 


~Baby Smiles~
It's the little things that make the days wonderful! 
Find them and take them to heart.
For who knows what tomorrow will bring.
So enjoy every minute!